
Everyday, I go to have lunch with Noah and I get to see first-hand, teachers working with and for the benefit of their students whom they form bonds with and truly care for, from the bottom of their hearts.
As I sit in the cafeteria, I like to pay attention to the absolute love the majority of these teachers have for their students, especially the special-needs students. I've always had a soft spot in my heart for special-needs kids. Whether Autistic or Down's Syndrome or any other "syndrome"... To see these teachers hold and protect these kids as they try to run away or hurt themselves is amazing. They chase after them, talk calmly and never lose their cool.
Teacher's aren't paid nearly enough to do this job. They do it because they love it and are passionate about it.
Without knowing what to do as a THANK YOU for Noah's teacher, I was left to wonder and think... I saw something SIMILAR to what I did and now I can't remember where I saw it but I've kind of taken and made my own version of what I would like to get if I was a teacher.
I've had a lot of people ask for tutorials and how I came up with the final product, so I decided to blog about it. I wish there was something more I could do to show my true and absolute appreciation for Noah's teacher for loving my child and teaching him... and most importantly, keeping him safe while he's out of my watchful eye when it comes to his peanut allergy. I can't ever begin to tell you how much she means to me.
SO... for my photo tutorial with some written instructions:
First, I had to make some basic purchases. I did shop around first before buying anything to get the best prices. (For example, I could have bought the acrylic paint at Hobby Lobby and saved a trip to Walmart, but it was 2x more expensive at Hobby Lobby as Walmart.)
HOBBY LOBBY:
1. Figure out how many kids are in the class and buy unfinished wood tulips with attached dowel. $1.29 each.
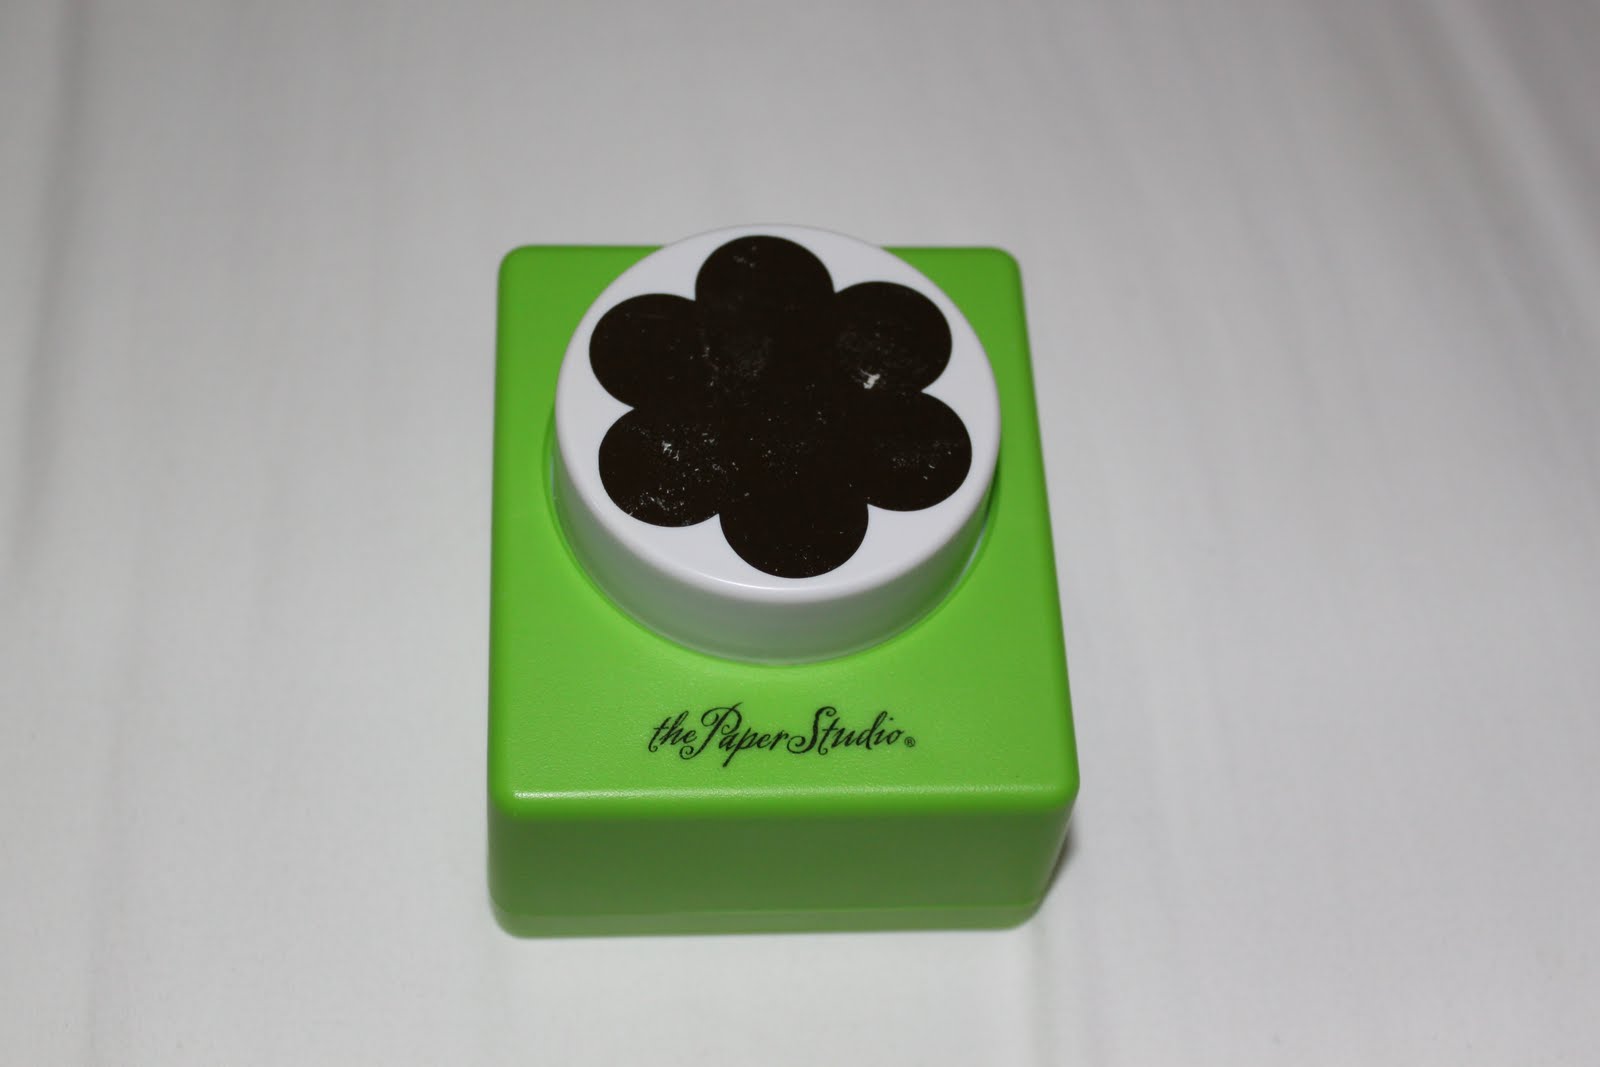
2. If you don't already have a "punch" you can pick one up also at Hobby Lobby for $11.00 for a 3" flower cut out. (You will be so glad you invested in this rather than trying to do every photo by hand and plus it will give a look of uniformity.)
FRONT OF PUNCH:
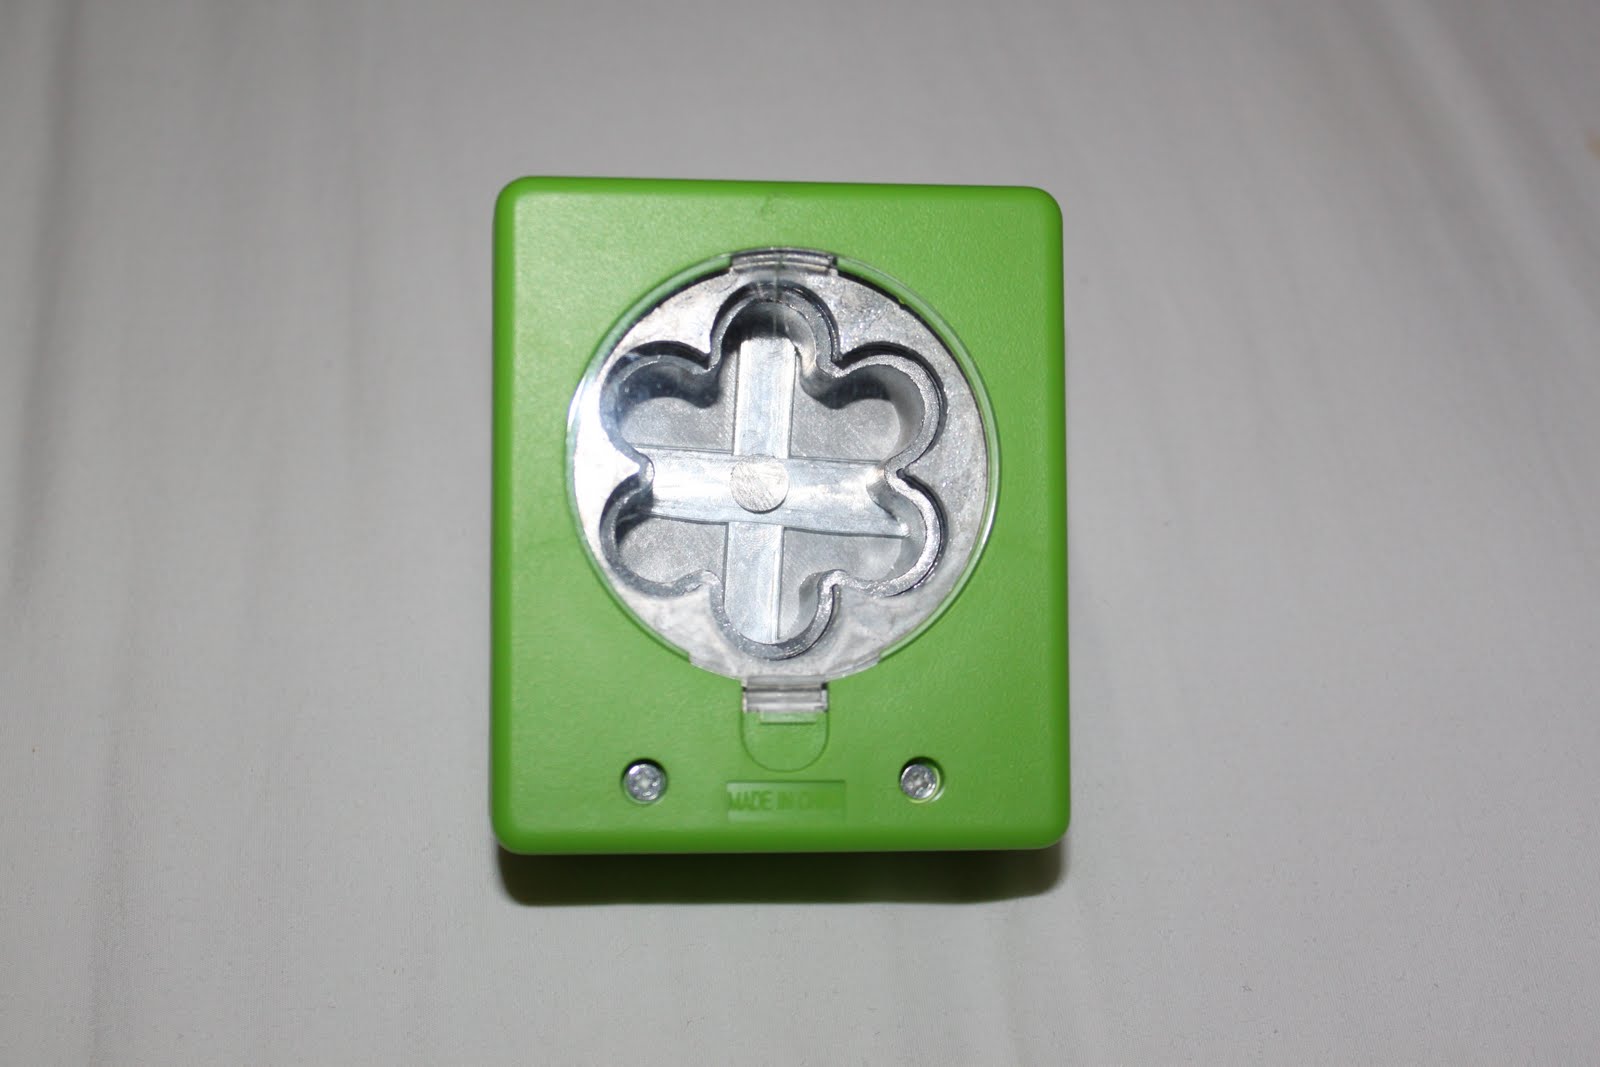
BACK OF PUNCH: (Make sure you get one with a clear back so you can see the area of the picture you're punching and not going in blindly and hoping you get it right.)
3. Mod Podge - Original ~ $6.99 for a large jar.

WALMART:
1. Acrylic paint if you don't already have some at home. Price ranges from .99 to $3.00 per bottle, depending on size; you don't need much. (be sure to get green for the stems of the tulips and whatever color(s) you want for your tulips.)
2. Large ceramic pot found in the garden department (indoors) large enough to fit an 8" plant. (or larger if your class is bigger than 20 students). $10.00

3. Large bag of fake grass/moss found inside by the glass vases and silk flowers. $2.50.
4. Mod Podge brand Acrylic Spray Sealer (which is necessary to "seal" the tulips after painting with Mod Podge Original paste, otherwise tulips will still be "tacky" and will stick to each other if placed together and pull off Mod Podge paste, even after completely dry.) $4.00 (estimate, I can't remember exactly but it was around this price).

I went to school to have lunch with Noah and after lunch, got all of the kids' pictures taken with the cooperation of the teacher. All individually but against the same background so there was a similarity to all of the pictures. Also, I was sure to set my zoom the same for each child. I zoomed slightly so there was a little background to the top, left and right of their heads and went down about mid-chest. I sent the pictures to be developed at Walgreens who had a coupon (always do a google search for coupons!) - - 50 prints for $5. (SCORE!)
Upon coming back home from picking up the prints, I got out the acrylic paint and painted each tulip. The stems were painted green and each tulip took on a different color.

As the tulips were drying, I took out my punch and carefully centered each child's face into a flower-shape.

Then I punched out the photo, taking great care not to move the punch or photo so it didn't get knocked out of being centered. (You do have to set it on the ground or hard surface and really lean into it to punch it. You will feel it punch when it goes through; practice on a piece of regular blank paper first if you need to).

Once all of the pictures have been punched, take a paint brush and dip it into the Mod Podge Original and paint it liberally on the back of each picture.

Once there is Mod Podge on the entire back of the photo, carefully place it in the lower center portion of the tulip (as long as the acrylic paint has dried!). Take your finger and press each section of the flower to press OUT any additional Mod Podge and seal it really well to the wood tulip. The excess that comes out, just take your finger and spread it outward on the wood tulip.
After a few seconds, re-dip your paint brush in the Mod Podge Original and liberally apply it all over the wood tulip (not the stem) and over the face of the picture. Don't worry, it dries clear and does not ruin the photo!

Also, take care to keep your strokes uniform because in the reflective light, you WILL be able to see brush strokes like this:

The brush strokes are unavoidable, but it's better to have them all going in one direction rather than some up and down and some left to right and others diagonal.
As the Mod Podge dries, it becomes clear and seals the photo to the wood tulip in addition to the Mod Podge holding the photo directly to the tulip.

Once Mod Podge Original is completely dry, get your Mod Podge Acrylic Spray Sealer and shake WELL and apply evenly to the top, bottom and all sides of your tulip.

Since you are spraying all sides, it's important to find a way to set these upright so the acrylic sealer does not stick to other things. I set up the grass/moss in my pot and stuck each one down into it to dry. (I only sprayed 1-2 at a time and let at least an hour pass in between each one so they didn't accidently touch each other as they dried.)
Once they were all done, I organized them into the grass/moss in the pot and the final product looks like this:

I decided also to buy a larger flower than the ones the students are on (also from Hobby Lobby) and will print out a larger picture of the teacher (either by ordering a 5x7 or simply zooming in on her face more and printing the same 4x6. Her picture on the bigger flower will go in the middle of the pot and either ON the pot or on her wooden flower, I will write: Bloom Where You're Planted. (You can write on the backs of each wood flower, even after it's sealed, with a silver Sharpie the year and/or child's name. (Reason for silver is to give it consistency for not only light colored tulips but the dark ones too.)
Anyway, I was also planning to put in the pot some cookie flowers my friend makes:

However, there is not enough room in the pot, so I will still order these cookies from her but have them wrapped in floral wrap so they look like a regular bouquet. SO, her final gift will be the pot with the tulip pictures of her students and then a bouquet of cookie flowers as well. I hope she likes it!


